How to import settings and profiles
Bring settings across from another caching plugin, apply a curated profile for your site type, or export your configuration to reuse on another site.
Configuring a caching plugin from scratch means making a few dozen decisions. This panel offers three ways to skip that: import what another plugin was already doing, apply a preset built for your kind of site, or copy a configuration you’ve already tuned elsewhere.
Where to find it
- In your WordPress admin, click xSpeed Cache in the left menu.
- In the xSpeed Cache sidebar, open the Tools group.
- Click the Migration card.
Shortcut: open
wp-admin/admin.php?page=xspeed#/tools/migrationdirectly.✅ This panel is part of xSpeed Cache (Free). Its one-click profiles and export/import are ⭐ Pro.
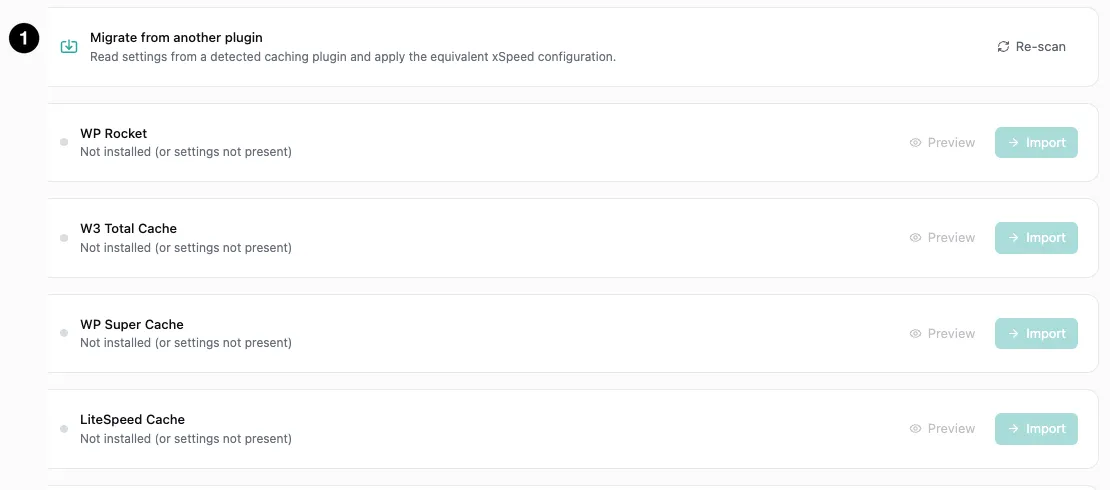
- Migrate from another plugin — detected sources, with Re-scan.
Settings at a glance
This panel has no stored settings — everything is an action:
| Action | What it does |
|---|---|
| Import (per plugin) | Reads a detected plugin’s settings and applies the xSpeed equivalent. |
| Apply (per profile) | ⭐ Pro — applies a curated preset for a site type. |
| Export profile | ⭐ Pro — downloads your current settings as a portable JSON file. |
| Import & apply | ⭐ Pro — loads a profile from pasted JSON or a file. |
| Preview | Shows what any of the above would change, before it changes it. |
How it works
Every action here has a Preview beside it, and preview is the point. It shows exactly which settings would change and to what, so you can decide before anything is written. Nothing is applied until you press the action button.
Importing from another plugin
xSpeed detects four caching plugins and reads their configuration:
- WP Rocket
- W3 Total Cache
- WP Super Cache
- LiteSpeed Cache
Each row shows its status. “Not installed (or settings not present)” means either the plugin isn’t there or it has no saved settings to read, with Preview and Import disabled. Re-scan re-checks after you install or configure something.
Import translates concepts rather than copying values — the other plugin’s exclusion lists, cache lifetimes and asset settings become their xSpeed equivalents. Preview first, since the mapping isn’t always one-to-one.
⚠️ Switching the other plugin off is always your choice. If the plugin you import from is still active, Import asks first — “How should xSpeed handle WP Rocket?” — and offers two ways forward: Import & switch to xSpeed, which imports and deactivates it, or Import settings only, which leaves it running. Cancel does neither. A plugin that’s already inactive imports straight away. From WP-CLI, deactivating the source is a flag that’s off by default: “running two page caches at once breaks both, but switching off another plugin is your call, not ours.”
If you choose Import settings only, deactivate the old plugin yourself once you’ve checked the import. Leaving both active is the one genuinely broken state this panel can lead you into.
One-click cache profiles
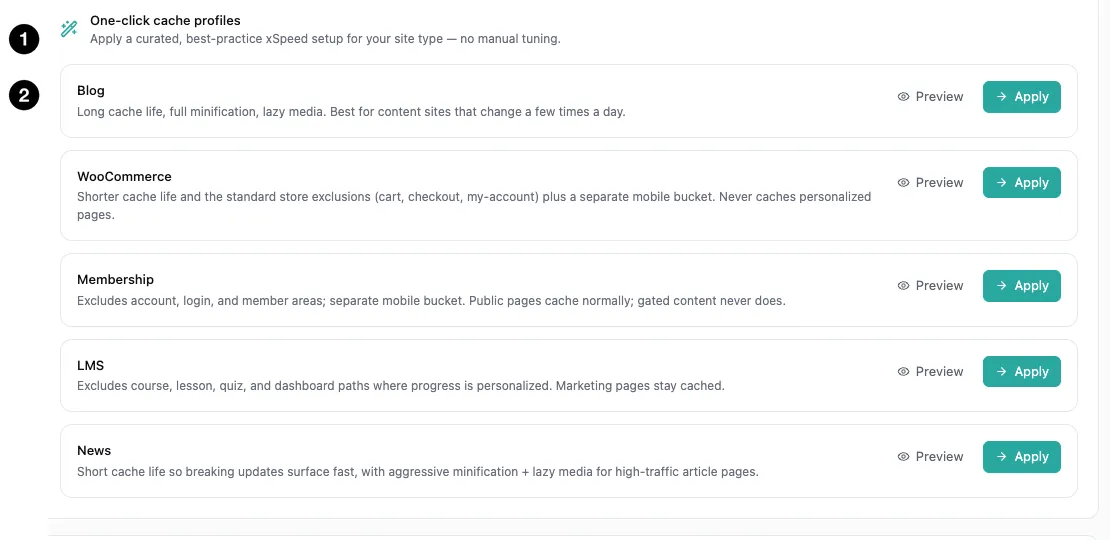
- One-click cache profiles — curated setups by site type.
- Individual profiles — each with Preview and Apply.
⭐ One-click profiles are part of xSpeed Pro. Without a licence this section shows a locked preview.
Five presets, each a best-practice configuration for a kind of site:
| Profile | What it configures |
|---|---|
| Blog | Long cache life, full minification, lazy media. For content sites that change a few times a day. |
| WooCommerce | Shorter cache life, standard store exclusions (cart, checkout, my-account), separate mobile bucket. Never caches personalized pages. |
| Membership | Excludes account, login and member areas; separate mobile bucket. Public pages cache normally, gated content never does. |
| LMS | Excludes course, lesson, quiz and dashboard paths where progress is personalized. Marketing pages stay cached. |
| News | Short cache life so breaking updates surface fast, with aggressive minification and lazy media for high-traffic article pages. |
The pattern across them is the same trade: how personalized your pages are decides how much you can cache. A blog caches nearly everything for a long time. A membership site has whole sections that must never be cached for anyone. The profiles encode those decisions so you don’t have to derive them.
These are a starting point, not a final answer — apply the closest one, then adjust individual panels.
Export and import your config
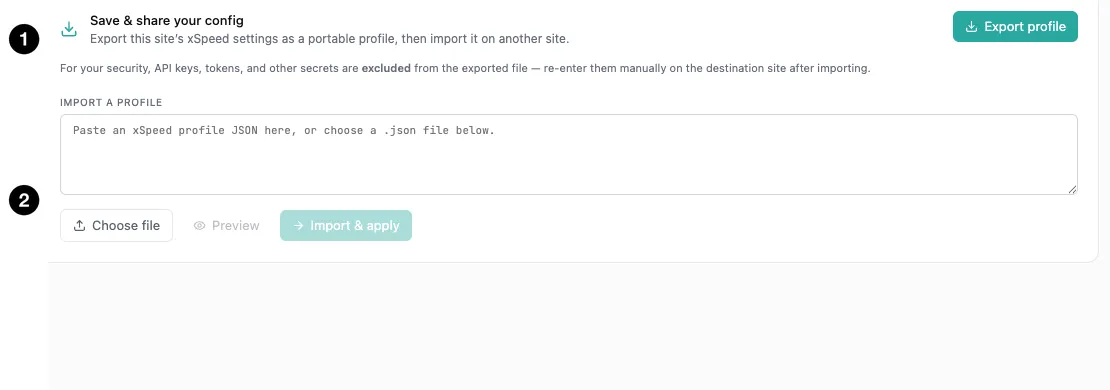
- Save & share your config — with Export profile.
- Import a profile — paste JSON or choose a file.
⭐ Export and import are part of xSpeed Pro. Without a licence this section shows a locked preview.
Export profile downloads your current settings as JSON. Import a profile takes it back, either pasted into the box or loaded from a .json file, with Preview before Import & apply.
This is how you configure one site and replicate it — a staging site to production, or the same setup across a group of client sites.
🔒 Secrets are excluded from the export, by design. The panel says so directly: API keys, tokens and other secrets are not written into the exported file. That’s the right call — a config file that quietly carried your Cloudflare token would be a credential leak the moment you emailed it to someone.
The practical consequence: after importing on a new site you must re-enter every credential by hand — Cloudflare, the PageSpeed API key, any AI provider key. The import will otherwise look complete while those integrations sit unconfigured.