How to install xSpeed Cache Pro
Install the Pro add-on beside the free plugin — download the zip from your WPDeveloper account, upload it, then paste your licence key and confirm the emailed code.
xSpeed Cache Pro is a separate plugin that installs beside the free one — which has to stay installed and active, because Pro reads its module registry and settings framework. Pro adds Critical CSS, Unused CSS, WebP and AVIF conversion, real-user monitoring and more — Free vs Pro lists every module on each side. Two things have to happen before any of it runs: the plugin has to be installed, and its licence key has to be activated. This page covers both.
How to install and activate xSpeed Cache Pro
Step 1 — Download the Pro zip from your account
- Sign in to your WPDeveloper account. If you haven’t bought a licence yet, the plans are at xspeedcache.com/pricing.
- Open Downloads.
- Find the xSpeed Cache Pro row and click Download. The file is named like
xspeed-pro.x.x.x.zip. - Don’t unzip it. WordPress wants the zip exactly as downloaded.
- Copy the licence key on the same row — you’ll need it in step 5.
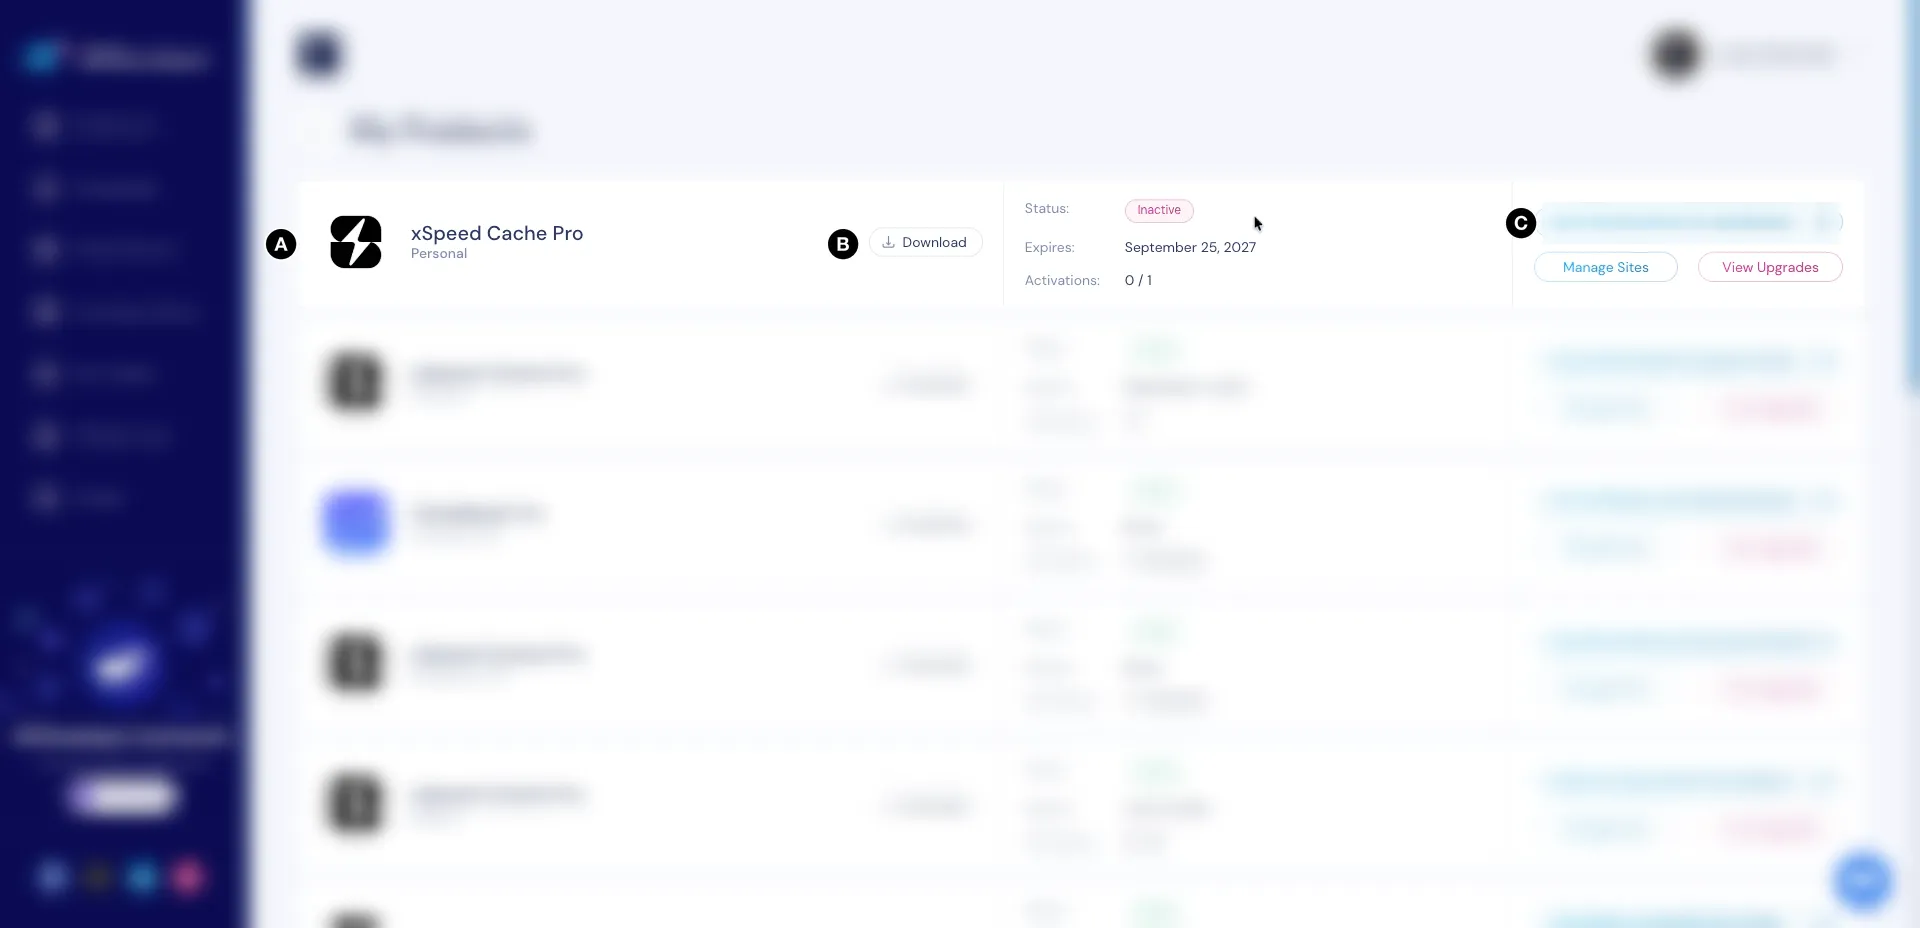
- A — Your licence, with its status, expiry date, and how many of its activations you’ve used.
- B — Download, which gives you the zip.
- C — The licence key. It’s hidden in this screenshot, and worth hiding in yours.
Step 2 — Upload the zip to your site
- Go to Plugins → Add New Plugin.
- Click Upload Plugin at the top of the page.
- Click Choose File and pick the zip you downloaded.
- Click Install Now.

- A — Choose File and Install Now. The zip goes here, still zipped.
Step 3 — Activate the plugin
- When the install finishes, click Activate Plugin.
- Go back to Plugins → Installed Plugins.
- Check that xSpeed Cache and xSpeed Cache Pro are both listed and active.

- A — xSpeed Cache, the free plugin, still active. Pro does nothing without it.
- B — xSpeed Cache Pro, the add-on you just installed.
⚠️ Activating the plugin is not the same as activating your licence. Until a key is entered, Pro modules stay locked exactly as they were before you installed it. That’s the next step.
How to activate your licence
Step 4 — Open the licence panel
- In your WordPress admin, click xSpeed Cache in the left menu.
- In the xSpeed Cache sidebar, open the Settings group.
- Click the License card.
- Check the status: without a key, the panel reads Inactive.

- A — The status, Inactive, with the line “Paste a key to activate updates + Pro features.”
- B — The License key field and the Activate button.
Step 5 — Paste your key and activate
- Paste the licence key you copied in step 1 into the License key field.
- Click Activate.
🔒 The key is a credential. Anyone who has it can use your seat. Keep it out of screenshots, support tickets and forum posts.
Step 6 — Confirm the verification code, if you’re asked for one
Activation can ask you to confirm by email, so a key can’t be used on sites you don’t own. When it does, the panel swaps to a code field.
- Open the inbox of the email address on your WPDeveloper account.
- Find the 6-digit code xSpeed just sent.
- Type it into the code field.
- Click Verify. If the email hasn’t arrived, click Resend first.
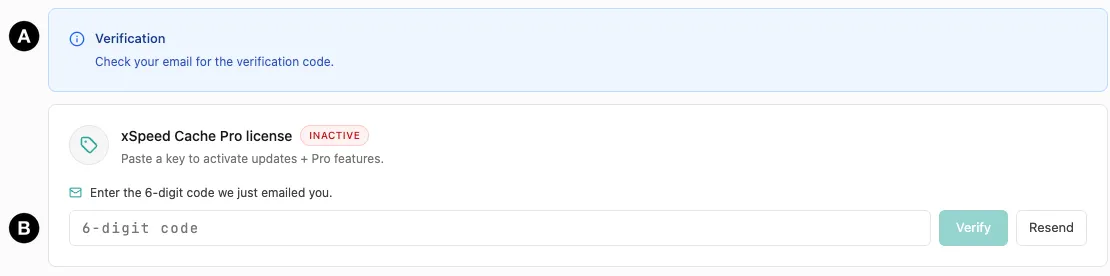
- A — The notice: “Check your email for the verification code.”
- B — The code field, with Verify and Resend.
Step 7 — Check that it worked
- Confirm the panel now reads Active.
- Check the Expires date is the one you expect.
- Look at the bottom of the sidebar — it should read Pro Licensed.

- A — Active, with “Receiving updates + Pro features from store.wpdeveloper.com.” Those are the two things the licence buys: the modules work, and updates arrive.
- B — The key, masked to its first and last four characters (blurred entirely here), and the date your entitlement ends.
If the licence won’t activate, the panel states the reason inline — an expired or already-used key, or a server it couldn’t reach. Help & Support opens a ticket with your system report already attached.